Spring has sprung, warmer weather is here, and with it comes the urge to clean, organize, declutter, and do some sustainable spring cleaning on our homes. Spring is a season of rebirth, and after being cooped up inside over the long winter, it’s natural to feel the urge to reinvigorate our stale living space with a breath of fresh air—literally.
Are you tired of store-bought cleaning products with unpronounceable ingredients? Do you yearn for a fresher, greener approach to maintaining your home? Look no further! In this blog, we’ll dive into the world of homemade cleaners, where simplicity meets effectiveness.
If you’re considering creating your own cleaning recipes from scratch, a great place to begin is with this blog from Good Housekeeping. They share insights on making at-home cleaners, which can be less intimidating for beginners.
Are you passionate about eco-friendly cleaning solutions? If so, and if you’re serious about diving into the nitty-gritty of homemade cleaners, let us introduce you to Heather Dressing, who goes by the delightful moniker “Mommpotamus”. Heather is not only a homesteader but also a dedicated DIY enthusiast. She has generously compiled an amazing e-book filled with her favorite homemade recipes. You can download it for free and explore a treasure trove of effective and eco-conscious cleaning solutions.
For those seeking a tidier living space, we recommend checking out an article from Better Homes and Gardens titled “22 Genius Hacks for a Tidier Space in No Time”. These clever hacks can help you maintain a cleaner home.
Introducing SpaZa’s Eco-Friendly Hand-Knit Cleaning Collection—gentle on the Earth, making chores feel more pleasant to do:
At SpaZa, our knitting project isn’t just about yarn and needles—it’s about empowerment and community. Did you know that our initiative creates home-based employment for women in the outlying areas of Cape Town, South Africa? These remarkable women wear various hats: mothers, grandmothers, caregivers. And knitting? It’s their flexible superpower—a way to weave family, love, and financial independence into their lives, stitch by stitch.
]]>
Color psychology is the study of how different colors affect human behavior and emotions. Each color has its own unique psychological associations and can evoke specific feelings and moods.
Brick Red: Inspired by the earthy tones of brick, this muted red hue exudes warmth and character. Known for its energy and intensity, brick red can evoke feelings of passion, excitement, and coziness. With hints of orange, it adds a touch of vibrancy without overwhelming the senses.
Green: Representing nature, growth, and harmony, green can bring a sense of balance and freshness to your surroundings. It's an ideal choice for spaces where you want to promote a feeling of renewal and rejuvenation.
Ocean Blue: Blue is often associated with calmness, serenity, and relaxation. It's perfect for creating a tranquil atmosphere in your home, especially in areas where you want to unwind and de-stress.
Pearl Gold: This earthy tone blends the richness of gold with the vibrancy of yellow, adds depth and character to spaces, evoking feelings of comfort and nostalgia. It pairs beautifully with neutrals, greys, and even bold colours, making it a versatile choice for accent pieces, textiles, and decor. Whether used as a subtle accent or as a statement color, pearl gold injects and personality into your home, creating a welcoming and stylish environment.
Terrarosa (Pink): Inspired by terracotta and rose hues, Terrarosa brings a soft, serene vibe to any space. This gentle pink embodies warmth, femininity, and tranquility, creating a soothing ambiance. Its earthy undertones promote relaxation and comfort. The resurgence of pink, seen after Greta Gerwig's Barbie movie release, has influences Barbie Core's rise Design Best Magazine explores how pink invigorates home furnishings.
Soft Furnishings and Mood
Soft furnishings, such as cushion covers and throws, not only add color and texture to your space but also play a role in influencing the sounds within it. The plushness of cushions and pillows can help absorb sound, creating a quieter and more peaceful environment. Surrounding yourself with objects you love can also enhance your mood and comfort levels. After all, having items you love around you makes you feel happier and more at ease.
Using Colorful Cushion Covers to Enhance Your Space
Now that we understand the power of color psychology and soft furnishings, let's talk about how you can incorporate colorful cushion covers into your home decor to enhance your mood:
Choose Your Colors Wisely: Consider the mood you want to create in each room of your home and choose cushion covers in colors that align with that mood. For example, opt for soothing blues and greens in your bedroom for a peaceful atmosphere, or choose brick red and pearl gold in your living room to energize the space.
Mix and Match: Don't be afraid to mix and match different colors and patterns to create visual interest and depth. Experiment with complementary color schemes or mix contrasting colors for a bold statement. Need style inspiration? We love this article by Apartment Therapy - tips for mixing styles at home without looking like a crazy person
Rotate with the Seasons: Change up your cushion covers with the seasons to reflect the changing landscape outside your window. Opt for bright, cheerful colors in the spring and summer months, and switch to warmer, richer tones in the fall and winter.
Experience the Mood-Boosting Benefits of SpaZa Cushion Covers
Ready to transform your space and boost your mood? Check out our latest collection of cushion covers made from high-quality, 100% organic cotton in a range of vibrant colors and patterns. Surround yourself with comfort and colour, and create a space that not only looks beautiful but also feels inviting and uplifting.
]]>Many of the most revered Japanese arts have emerged from a need for practical solutions to everyday problems. Furoshiki, the art of gift wrapping using cloth, is no different. The term, which literally translates to “bath (furo) spread (shiki)” was first used during the Nara period (710-794) as a means to protect valuable goods. Furoshiki has since evolved into a popular practice around the world, with people using the cloths to not only wrap gifts but also to carry bottles, hold vegetables and even as table settings.
I was first introduced to the art of cloth wrapping last year while researching how to limit waste during Christmas celebrations. The thought of giving someone a gift in reusable fabric captured my mind and I vowed that this year, I would learn how to fold furoshiki multiple ways, which brings me to the topic of this blog.
Furoshiki can be applied to just about any object, large or small, and uses a series of simple knots and folds to create a wrapping that looks like art itself. The Japanese Ministry of the Environment has issued a handy pamphlet for reference but here, I’ll be detailing five of my favourite wrapping techniques, perfect for no-waste gift wrapping this holiday season.
The Basic Wrap
The Card Wrap
The Carry Wrap
The Bottle Wrap
Hidden Knot Wrap
And there you have it! Using elegant, decorative cloth, you can not only make gifts look beautiful but also gift a loved one with a reusable furoshiki that they can use for years to come.
]]>According to a report by U.K.-based environmental charity Hubbub, the plastic waste generated from “disposable” Halloween costumes and clothing exceeds 2,000 tons annually. And that number does not include the waste generated from Halloween decorations and candy.
All hope is not lost for Halloween enthusiasts, though. We’ve got you covered with this helpful guide with tips and tricks on how you can reduce your environmental impact throughout spooky season.
Choose your candy consciously
Conventional Halloween candy is synonymous with individually-wrapped sweets that have sometimes questionable names. Sadly, the commercial chocolate industry is driving deforestation and species extinction due to their high demand for cocoa beans, sugar and palm oil. And we’re not even talking about the waste created by the non-recyclable wrapping that these candies are packaged in.
One way you can reduce your Halloween footprint is by making some homemade sweet treats. Think cookies, fudge and other DIY Halloween treats. And instead of wrapping them in cellophane or plastic, you could put them straight into paper bags or hand them straight over. They won’t last long ;-)
And if making treats is too time-consuming, opt for products containing Rainforest Alliance-certified cocoa and sustainable palm oil. If possible, choose candies with recyclable packaging or no packaging at all.
Ditch the fake spider webs
We know they’re a Halloween staple, but fake spider webs can have major consequences for the environment. Most of them are made of polyester, which can take up to a millennium to degrade in landfills. Polyester spider webs can also pose a major risk to wildlife that can get caught in them and lack the strength to free themselves.
If you must include spider webs in your decoration repertoire, make your own with yarn, but make sure to leave plenty of space in between the “threads”.
DIY, swap or thrift your costume
Buying a new costume every year can be extremely wasteful, especially because most of them are made of cheap materials that release microplastics when washed. Instead of supporting the $3 billion Halloween costume industry, why not DIY your way to success? Simply look for material around the house or source your costume from a friend.
Another fun way to source a new Halloween costume is to host an annual costume swap. Or hit up your local thrift stores and vintage boutiques for a unique take on your next Halloween ensemble.
Say no to plastic trick-or-treat buckets
Trick-or-treat buckets decorated as Jack-o’-lanterns, cauldrons or Frankensteins can be a lot of fun but they’re not necessarily a necessity. Once your kids grow up, those buckets will sit and gather dust in your garage or attic, or worse yet, end up in a landfill. Opt for a reusable basket, pillowcase, or our personal fave, a reusable produce bag or bread roll bag - all of which do the exact same job without the harmful impact on our planet.
Use every part of the pumpkin
The beloved tradition of carving pumpkin is an inherently wasteful practice. You gut a squash just to carve it up, throw out the contents and then leave it on your porch to rot for the month. Thankfully, you don’t have to ditch the whole effort in order to make it sustainable. You can salvage the pulp for soups or broths and the seeds for roasting.
After Halloween passes, put the rest of your Jack-o’-lantern out for wildlife to eat rather than throwing it away. Just make sure it’s cut in half first so they don’t get their heads stuck in it. And if you don’t have a yard, consider donating them to a local animal shelter.
And there you have it!
With these tips, you can be conscious without missing out on all the spooky fun. Have a Happy (green) Halloween!
]]>Here at spaZa, we are simply in love with the idea of Halloween. From the crazy outfits to the delicious candy, Halloween happens to be one of our favourite seasons of the year. And when it comes to hosting gatherings, we can’t help but get excited at the prospect of dressing up a table, playing the hostess with the mostest and bringing the magic of the spooky season outside, inside to share with family and friends.
Whether you’re throwing a casual pumpkin carving party or hosting family and friends for a big Halloween bash, we’re here to help you put the season on full display by sharing our most loved gems from around the web.
And although Halloween hasn’t been celebrated in South Africa until recent times, we do love a good dress up party so here are some fun ideas of how you can get started on your Halloween celebration.
Pumpkin party
A classic, reimagined!
The idea is to go wild with the flavors of the Fall here. Grab a few pumpkins, hollow them out (or simply cut them) and create a menu from your bounty. Think rich pumpkin soup, indulgent pumpkin dump cake and delicious pumpkin martinis from the pulp or roasted pumpkin seeds for a nice snack.
Our dish covers would also make a great addition here, as they help cool dishes without the threat of condensation. Made of 100% GOTS-certified cotton, they’ll keep your hot soups and leftovers covered, without the harmful toxins that plastic wrap can introduce to food. They also make a beautiful addition to tablescapes.
Don’t forget to save your hollowed out pumpkins (if you have any) and create a masterful centerpiece by adding flowers into them for a colourful touch.
DIY your way to success
Decorations are one of the things that make Halloween so much fun. Keep them simple and cost-effective by incorporating some of these DIY ideas.
Simply order costume hats in bulk and suspend them from your ceiling using fishing line.
No time to carve? No problem! Simply wrap your pumpkin in some gauze and stick some googly eyes on it for added character.
These ghoulish creatures will keep an eye on the neighborhood even when you’re not at home. Print out the template, trace and cut out from contact paper.
Embrace spooky season
Grab a few pumpkins of different sizes, some cheesecloth and a few candles and you've got a centerpiece fit for even the most haunting Halloween party. Simply layer your cheesecloth in a tray, add the pumpkins and candles for some colour and height and add a few fake spiders in there for a little creepy crawly touch.
Scarily simple treats
We know how busy our lives can get and the thought of spending hours slaving away in the kitchen can be overwhelming. That’s precisely why we sourced a series of easy Halloween treats that you can make in 15 minutes or less. This video by Tasty Recipes is our go-to!
Green your Halloween
As much as we love it, Halloween can be a wasteful experience. It doesn’t have to be though. With these simple tips and tricks, you can still enjoy this season in an eco-friendly way, without spooking Mother Nature.
Instead of buying a pre-made costume, consider reusing or recycling a costume from previous years or make your own using items around your home. Here are some ideas to get you started.
Greening your Halloween ensures that you have fun without causing harmful effects to the environment. Think electronic invites, washable utensils and recyclable crockery. And don’t forget to put out recycling bins for bottles and cans.
If you or your children plan on trick or treating this Halloween, use reusable buckets, pillow cases or our personal favourite - reusable produce bags. This will make sure they enjoy their bounty without excessive amounts of plastic.
Casual and cosy
Combine earthy tones with minimalist table decor for a touch of effortless elegance. Our cutlery rolls work perfectly here, as form meets function by arranging cutlery on the table while also adding a pop of colour.
Our trusty casserole cloth cover also works amazingly well here, as it adds an organic feel to the table while helping keep pests away from baked dishes.
Happy Halloween from us at spaZa, to you!
A big, bold Cabernet Sauvignon. A smooth, velvety Merlot. A rich, creamy Pinot Noir.
Whatever your favourite vintage or varietal, the perfect reason to delve into tannins, berries and bitter notes is around the corner. As Red Wine Day approaches, we figured that now is as good a time as any to usher in the flavours of the fall and share some tips on how to pair your favourite wines on August 28th and beyond.
So, let’s start with the basics…
The basics of red wine
People are often intimidated by red wine due to its bold flavours. Depending on what you choose, the flavour profile of your wine could be dry, peppery, complex, bitter or a variety of other notes, all of which are equally delicious.
The main types of red wines are Cabernet Sauvignon, Merlot, Zinfandel, Syrah/Shiraz, Malbec, Pinot Noir, Sangiovese and Nebbiolo.
Wine pairing 101
Some advice for pairing food and wine can be overly strict, but the truth is, you can drink pretty much any wine you fancy with any dish. There are, however, some tried and tested guidelines that can help you navigate this sometimes complicated playing field.
Remember these general principles to start with:
The top 6 best red wine pairings
Most people pair red wine with bold flavours due to its strong taste. As a general rule of thumb, always choose foods that are equally as bold as the wine. Some good pairings include:
Let your wine “breathe”
Despite the never-ending debates on the validity of allowing wine to “breathe”, we believe that exposing a good wine to oxygen does help the flavours become more expressive. While more fragile wines should be handled with a bit more care, younger, more tannic wines typically do benefit the most from “breathing”.
To get the full benefit of aerating wine, a good tip to follow is to pour it into a decanter to allow the wine more surface area.
Did you know that our tiny tops were invented to help this process? We were approached by a wine farm a few years ago to develop covers that could fit over a decanter to allow for wine to breathe without the interference of bugs and flies. And so our minis were born…
As you decant your favourite red, don’t forget to pop on one of our mini dish covers to protect your precious vino as it flourishes into its fullest, delicious potential. Our jug and extra small dish covers (also part of our mini dish cover set) will come in handy when covering snacks, mousses and pâtés so your full wining and dining experience is covered.
From all of us at spaZa, have an amazing Red Wine Day!
When I think about Easter, there are some very specific foods that come to mind. Amongst these are pickled fish, freshly baked bread and pickled fish. But the one dish that stands out among the rest is definitely the coveted Hot Cross Bun.
In my family, we would buy these over several weeks before and after the Easter Weekend and serve them warm, cut in half with a dollop of butter melting over the middle. And even though my love of spicy Hot Cross Buns has since changed to a penchant for the chocolate variant, this traditional baked morsel of deliciousness will always hold fond memories for me.
While planning for this year’s Easter weekend, my mind wandered back to my fave Easter treat and I got to thinking - where did Hot Cross Buns come from and why exactly do we eat them during Easter? After some extensive research, I uncovered the answers…
The surprising history behind the Hot Cross Bun
“This is the season at which all good Christians devour hot cross buns for breakfast, under the comfortable impression that a religious duty is being performed.”
This was according to Figaro magazine, published in London in 1836. Could this be the reason that we eat these tasty treats during Easter time? Not necessarily.
Hot Cross Buns are said to have originated in the 12th century when an Anglican monk baked the buns and marked them with a cross in honor of Good Friday. He would distribute them among the needy and after they gained popularity, Hot Cross Buns eventually became a symbol of Easter and this is where the tradition of eating them on Good Friday began.
Looking even further back, history would have it that the original precursors to Hot Cross Buns were loaves that were found marked with a cross at Herculaneum. While this is possible (Christ had been nailed to the cross half a century earlier), it is more likely that the loaves were incised to make them easier to break apart.
Whatever the case, we know for certain that crossed buns were eaten by the Saxons to honour Eostre, whose name is the origin of the word Easter. For Eostre, the goddess of the dawn and fertility, the cross is said to have symbolised the four quarters of the moon. As was often the case, a Christian tradition was adopted from a pagan festival, turning Eostre’s feast into a celebration of Christ. And so the cross on top of the bun came to symbolise not only the Crucifixion, but also the intersection of Earth (horizontal) and Heaven (vertical) - the human and the divine.
The history of the Hot Cross Bun does have some sordid moments, however. In the 16th century, Queen Elizabeth I passed a law limiting their consumption to certain holidays. The English were deeply superstitious and believed that the buns carried medicinal and magical properties, and were scared that their powers would be abused. Some even believed that the buns would never go stale!
To this day, a Hot Cross Bun that was baked in 1807 exists in Essex, as well as another in London that is dated 1821. So maybe the Brits weren’t completely off in their beliefs.
Although they have become considerably more expensive over the past few centuries, Hot Cross Buns have (thankfully) remained the same throughout. Today, as it was in 1836, “the little boys devour hot cross buns with a most sacred Gusto, which shows that if there is any virtue in the act, the youth of the present day are the very best performers of the religious duty.”
]]>As the daughter of an avid baker, there are few baked goodies that I haven’t tried. From lamingtons to cornbread, my mom always had a new recipe that she wanted to try and I was happy to be the taste tester. Bread, however, was never really one of those things either of us had much interest in. That all changed recently when Julia sent me a gallery full of images from her bread baking adventures…
To be honest, I never really thought of sourdough bread as a feasible means of sustenance. Yeah, sure, it made a nice sandwich base whenever I went out for brunch but it’s not really something I would actively make or buy. That is until Julia showed me that it could not only be made at home, but that our spaZa products made the process smoother than anticipated. Through research and a little probing, I found out a lot about the process of baking sourdough and with a little help from Julia’s favourite resource, my fascination with sourdough began. Here’s what I learned…
First thing’s first… What is sourdough?
To put it quite simply, sourdough is slow-fermented bread.
What makes it unique is that it doesn’t require commercial yeast to rise and is instead made with a live fermented culture, a sourdough starter, which acts as a natural leavening agent.
Sourdough has a delicious tangy flavour, chewy texture and crispy, crackly crust. It is also more digestible and easy for the body to absorb.
Baker’s terminology
Starter
A mixture of flour and water that is allowed to ferment naturally. A starter can be refreshed (fed) indefinitely to keep the fermentation active and healthy, and needs to become fully ripe before it can be used to make bread.
When making bread, a small amount of the starter is used to create an off-shoot called a leaven.
Leaven
A leaven is made by mixing a small off-shoot of your ripe starter with water and flour (and sometimes sugar) and allowing it to ferment prior to mixing it into a dough. This is the vehicle for adding yeast and bacteria to the dough. Unlike the starter, which can be used for several loaves, the entirety of the leaven goes into the dough.
Autolyse
A mixture of flour and water that occurs at the beginning of the bread-making process. The goal of autolyse is to initiate enzymatic activity into the dough to help draw out sugars from the flour. Additionally, it increases dough extensibility (flexibility within the dough).
Bulk fermentation
This relates to the dough’s first rise. Bulk fermentation occurs after flour, salt and leaven are mixed into a dough, placed into a vessel and covered to allow fermentation to take place. This step is critical, as it translates to flavour and rise in the final bread.
Proof
The proof is the dough’s final, or second, rise and occurs after the dough has been divided and shaped. During this time, the dough continues to ferment, which further strengthens and leavens it.
Sourdough starter 101
Well before you can begin the process of baking, you need to develop or obtain a healthy sourdough starter that shows consistent signs of fermentation.
To make a sourdough starter, you’ll need to combine flour and water in a jar and cover with a small dish cover. This will allow it to ferment before you begin the process of regular feeding with flour and water to maintain maximum rising power.
When is my starter ready to use?
Your starter will be ready to use when it becomes bubbly and doubles in size. This can take anywhere from 2-12 hours or more, depending on the temperature (warmer is better) and the condition of your starter. Be patient!
Float test: To test the readiness of your starter, simply drop about a teaspoon of the mixture into a glass of water. If it floats to the top, it’s ready to use. If it sinks, it needs to be fed again.
How to use a starter
If you’ve fed your starter and it’s bubbly and active, pour the amount you need out of the jar to weigh or measure for your recipe.
Don’t forget to feed any leftover starter to keep the process going.
Storage options
If you only bake a few times a week, refrigerating your starter would be the best option. Feed your starter weekly.
For more avid bakers, store your starter at room temperature and feed it at least once a day.
How to make your sourdough bread
Step 1: Mix the dough
Mix your ingredients together (SEE RECIPE HERE) until the flour is fully absorbed. The dough will feel dry, rough and shaggy. Cover with a damp dish cover and let rest for about 30 minutes.
Step 2: Stretch and fold
After the dough has rested, perform 4 sets of stretch and folds, 30 minutes apart.
Step 3: Bulk fermentation
After your stretch and folds are completed, let the dough rest, covered, on the counter for around 6 hours. This may take more time if your house is cooler and less if you reside in a warmer climate. When your dough has doubled in size, it’s ready for shaping.
Step 4: Shaping
Once your dough has a glossy top and is puffy, gently move it out of the bowl onto a floured work surface. Let the dough rest for 10-15 minutes and then shape into a loaf.
Once shaped, put the dough into a banneton. You can create your own proofing vessel by lining a bowl with a floured dish cover, with the seam side of the dough facing upwards.
Step 5: Second rise
Cover the dough with a damp dish cover and let it rise on the counter for about 2 hours.
Step 6: Score the dough
After the second rise, and right before baking, score the dough down the center. This will allow the steam to escape and for the dough to expand during baking.
Step 7: Baking
Place the dough into a baking pot and cover before adding to a pre-heated oven at 400℉ or 200℃.
Bake on the center rack for 20 minutes.
Remove the lid and bake for an additional 40 minutes, uncovered, until golden brown.
Remove from the oven and allow to cool for at least 1 hour before slicing.
CONGRATULATIONS! You’ve made it to the end!
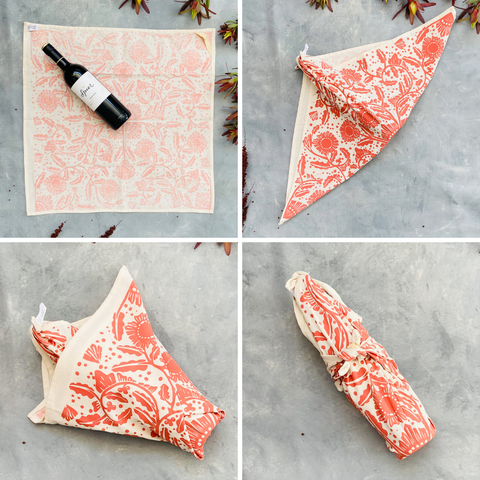
Hopefully, using this blog as a guide will lead you to a masterpiece of a loaf. Simply pop it into a loaf bag for storage and enjoy!
And if your loaf didn’t turn out perfect, don’t forget to eat your mistakes and try again!
I’ll admit it - kombucha was something that I never really had much interest in. Given that it’s quite a pricey beverage, it was never something that I was tempted to splurge on. I always thought of it as the drink of the hippies and health freaks and honestly, the thought of a SCOBY floating atop my drink just put me off entirely.
Then came the day when I took a dive straight into the unknown and tasted it. The tart, vinegary deliciousness that covered my tastebuds was almost ethereal and after finding out about all the probiotic benefits of this fizzy favourite, I was sold!
Although I enjoy the refreshing taste of kombucha, brewing it was something that I never even bothered considering. That is until I started working for SpaZa and I discovered the many uses for dish covers. It was then when I decided to look into the process of making homemade kombucha and how our dish covers could be used to enhance the process. And while there are a million methods of brewing and a million more tips and tricks, this is what I’ve learnt works for me and will hopefully work for you.
A few basics before you begin:
How to make a SCOBY from scratch:
How to make your first batch of kombucha:
A few extra tips:
Allow your booch to breathe. Kombucha requires breathing room and air. This is why our dish covers offer the perfect solution for this. They’re breathable, allowing adequate ventilation while keeping out bugs and other contaminants.
Flavour your kombucha with organic juice. When flavouring your base kombucha, it’s best to use organic 100% juice and bottle the flavoured kombucha in a swing top jar. This will allow for great flavour and adequate carbonation.
PLEASE NOTE: Leaving your kombucha to ferment for too long in a sealed jar can result in a build-up of pressure and could cause the bottle to explode or liquid to gush out. Make sure to open your jar over the sink or outside.
Keep it clean. This is an incredibly important step that many people neglect. Be careful when handling anything that comes into contact with your brew and make sure that all your tools and jars are clean before starting the process. Contaminants of any kind could cause mold on your SCOBY, in which case you would have to toss it and start over. Trial and error is a huge part of the process so learn from your mistakes along the way and make sure to clean in between steps.
While brewing your own kombucha can be a time-consuming exercise, it’s also extremely rewarding. Make sure to be patient through the process and before you know it, you’ll be a master at making your own kombucha. Happy brewing!
There’s a very simple joy that comes from the snap of a fresh broccoli stem or the crunch of a raw carrot. And while you may revel in your new bounty, the moment tends to be short lived as the struggle to keep pesky perishables perky settles in.
Our founder, Julia Schaffer, challenged me to take on the task of researching and uncovering the best strategies when it comes to storing fresh produce. And let me tell you, it’s been a journey and then some! From kitchen mishaps to experiments gone right, my eyes have been opened to the myriad of ways that my produce could be saved from ultimate rot.
With that being said, here’s what I found:
Let’s start at the beginning - the selection process. Selecting the freshest fruits and vegetables is the first step in ensuring that produce has a long shelf life. A handy tip that Julia gave me is to check how straight the stem of the plant is. Older stems tend to split apart over time. You can see the freshness of leafy greens by checking the condition of the stem where it has been trimmed from the plant.
I know it’s tough, but avoid pre-cut and pre-packaged produce. As a person who loves pre-packaged veggies, my heart sank several levels when I found out that it not only costs more but may also be less nutritious. Because the skin or rind of the plant typically locks in nutrients, pre-cut produce tends to be lower in nutrients and this is why it’s always best to rather select your fresh fruit and veg yourself. Our reusable bucket-shaped produce bags are perfectly designed for this purpose. They have a padded bottom, providing optimal protection for fresh produce.
Lastly, I learnt to make the most of shopping trips by planning ahead. Pre-planning meals has allowed me to buy my fresh produce as close as possible to the day that I plan to use it. A top tip that Julia taught me was to use leafy greens first and store firmer veggies for use on subsequent days. This makes them stretch a whole lot longer.
When storing fresh fruit and veggies, my research led to the three main points to consider: temperature, ethylene and airflow.
Some fruits naturally release ethylene gas, which hastens the ripening of certain types of produce, causing them to decay at a much faster rate. With this knowledge in mind, I have now learned how to separate ethylene-sensitive fruits and veggies from those that emit this gas.
I also discovered that air circulation is very important for produce that keeps best at room temperature. Instead of using it to store random bits and bobs, I started making proper use of my fruit basket after realising that plastic bags trap air in. It also happens to make a pretty nice display! Another handy tip is to use produce bags to store this type of produce, as they are breathable and encourage air circulation.
For produce that requires refrigeration, don’t be like me and forget that you have crisper drawers!
Do you know how to use your crisper drawer correctly? If not, you’re not alone. Neither did I before this challenge! While this may seem like the perfect place to store beer cans or leftover containers, the crisper drawer is actually meant for fresh produce and when used correctly, can extend the life of fruit and veggies.
Crisper drawers offer a more humid environment than the rest of the fridge and can usually be adjusted between high and low humidity through a sliding humidity control setting that opens or closes a small vent in the drawer. If your crisper drawer, like mine, doesn’t have a humidity control, that simply means that it's a high-humidity crisper.
When separating produce between drawers, the general rule of thumb is to put produce that tends to rot easily in a drawer with a low-humidity setting. Produce that wilts will go into a high-humidity drawer.
Another amazing fact I discovered is that the crisper drawer is designed to work best when two-thirds full! Just make sure to give your precious produce enough room to breathe when packing.
Delicate leafy greens such as rocket arugula, lettuce, mustard greens, watercress, English spinach and chard are notoriously quick to wilt and rot. A great way to store this type of produce is to rinse the leaves and lay them out on a clean, dry tea towel and gently roll them up before storing in the crisper drawer. For sturdier leaves such as kale or cos lettuce, you can rinse and toss into produce bags before storing in the fridge.
Always use your greens efficiently - pre-plan your meals and try to buy them as close as possible to the day you intend to use them. Consider making a salad or a dish that requires raw greens on the day you bring them home from the store.
Here’s a downloadable guide with some helpful tips for produce storage.
When it comes to festive holidays, Christmas tends to reign supreme. Between the gifts and glitz and the delicious dinner spreads, it’s a difficult celebration to compete with. New Year’s Eve, however, is a great contender for the spot of ‘fave holiday’. Not only is it the final celebration of the year, but it’s also a moment to reflect while welcoming a new beginning. And even though it might present the perfect opportunity to dress up and boogie down, it’s also a chance to celebrate a few traditions as well.
As we get ready to ring in the new year, we’d like to delve into culinary heritage from across the world and discover the deep, layered meanings behind some of the world’s most ancient food traditions. Here are 10 different New Year’s Eve foods that you can eat for wealth, health and good luck going into 2022.
Grapes
When the clock strikes midnight, people across Mexico and Spain eat a grape for each month of the upcoming calendar. This tradition is believed to bring about luck for the year ahead, while any sour grapes indicate months that may be challenging within the year.
Black Eyed Peas, Greens and Cornbread
These three dishes are meant to be eaten as part of the same meal to bring about wealth for the upcoming year. In the Southern parts of the United States, black eyed peas are believed to bring pennies, while greens bring dollars and cornbread brings gold, respectively.
Pomegranate seeds
Pomegranate seeds have long been seen as a symbol of fertility and abundance. In Greece, the whole fruit is thrown across the floor to release a sea of seeds that indicate fertility, life and abundance. If you’re not up for the clean up that follows that mess, you might want to follow this tutorial on how to cut a pomegranate.
Fish
While fish may symbolise abundance around the world, the way it is eaten varies between countries. In Asia, people feast on whole fish around the Lunar New Year, while people across Europe sink their teeth into carp, herring and cod. Fish are believed to be lucky because their scales resemble coins, while their swimming patterns symbolise progress and moving forward through the upcoming year.
Noodles
Super long noodles are thought to represent long life and although it may be frowned upon at other times, slurping up the dish is encouraged on this holiday. Longevity is said to be in the length of the noodle so more luck is received if you manage to eat the length of the noodle without breaking it.
Ring cake
Ring-shaped cakes, like Bundt cakes, are a symbol of coming full circle, making them a perfect New Year’s Eve food. Stemming from the Greeks, this tradition sees hidden trinkets being baked into the cake, bestowing luck upon the lucky recipient who finds a trinket in their slice.
Oranges and honey
In Asian cultures it is believed that eating oranges and honey on New Year’s Eve will bring good fortune, wealth and money. Having an orange with the stem and leaf attached is also believed to bring a long life and fertility.
Lentils
Round like a coin, lentils are said to bring about good luck for the New Year and beyond. This ancient tradition comes from the Romans, who believed that the lentils would turn into gold coins.
Sauerkraut
According to German and Eastern European superstition, ringing in the New Year with a plate of sauerkraut represents wealth for the coming year. It is believed that eating this traditional New Year’s Eve food will increase your bankroll for the year to come.
Pork
From Cuba to Austria, pork is a common feature on many New Year’s Eve menus. This is because pigs are believed to symbolise progress. Due to the fact that pigs move forward when they eat, they are believed to bring about progress throughout the year ahead. Their rotund shape is also said to symbolise a fat wallet ahead.
No matter what your food tradition, we hope you have the happiest New Year and that you go into 2022 with a comfortably full belly!
Hosting a New Year's Eve party? Ensure that your guests' Chardonnay doesn't get mistaken for Prestige Cuvée with our handy glass tags.
Simply print, cut out and hand out to guests on arrival.
]]>
The Earth’s temperature is rising every year. Wildfires are spreading and water is growing increasingly scarce. But spekboom can help.
Portulacaria Afra, commonly known as “spekboom” is a succulent plant indigenous to South Africa. This sprawling bright green shrub could be the key to offsetting carbon emissions and helping to restore balance to our planet.
By acting like a carbon sponge, one hectare of spekboom can absorb between 4 and 10 tonnes of CO2 per year and is 10 times more effective per hectare at carbon fixing than any tropical rainforest.
In addition, this evergreen wonder plant grows without formal planting and can do so using very little water. It is also fire-resistant and can live for up to 200 years.
This is why we’ve partnered up with Respek Nature, a propagation network that seeks to offset carbon emission by planting thousands of spekboom in the Eastern Cape province of South Africa.
With just a click of a button, you can make a move with the future in mind and play a valuable part in mitigating the harmful effects of climate change.
]]>Spring is one of our favourite times of the year and the reasons are obvious! Longer days, warmer weather and a sense of renewal fill the air. It’s also the best time to refresh your home and put the term ‘spring cleaning’ into action.
Before you get all your cleaning supplies out and start wiping down every surface in sight though, it might be worth considering your cleaning routine and looking at ways you could make better choices regarding the health of not only your household, but the environment as well.
From eco-friendly swaps to DIY solutions, we’re here to help you on your way to green cleaning success. Let’s get into it…
Did you know that it takes approximately 17 trees and almost 76,000 litres of water to produce just one ton of paper towels?
In addition, paper towels cannot be recycled due to the manufacturing process that goes into making them. While they start off as mixtures of wood, cardboard and paper by-products, these get pounded into a pulp that weakens and breaks down natural fibers. And even the brown, unbleached types are not suited for recycling due to contamination once they are used.
You can boost your eco-conscious efforts by switching to reusable alternatives such as old clothes, old sheets or biodegradable kitchen cloths. They make for perfect cleaning supplies without unnecessary waste.
Biodegradable cloths are also multipurpose and can be used in several different ways. While they are known for cleaning up kitchen spills, their life can also be extended to the bathroom where they can be used for personal care. From the bathroom tub to the kitchen counter and the playroom, you can certainly get the most out of your cloths.
If you’re ready to save time and money, a great place to start is by mixing up your own cleaning solutions.
Start with baking soda and vinegar - two of nature’s most famous cleaning wizards. They’re readily available, non-toxic and make excellent bases for homemade scrubs, pastes and sprays.
If you’re looking to get a little more adventurous, check out our Pinterest board for some DIY mixing inspiration.
Giving new life to old items is not only simple and easy, but super beneficial for your pocket as well.
Combine your love of all things budget-friendly and planet-friendly by making use of old household items for new chores.
Our favourite tricks:
Take a break between scrubs and sweeps by tuning in to sustainable living podcasts.
Some of our favourites include Practical(ly) Zero Waste, The Slow Home Podcast and Sustainable Minimalists.
Filling your home with cosy smells shouldn’t damage the environment. Opt out of synthetic fragrances by simply ditching chemically-enhanced air fresheners and cleaners whenever possible. Baking soda is also a natural deodorizer, making it a great addition to homemade cleaners.
According to studies, synthetic fragrances often contain phthalates, which have been linked to asthma in children.
Swap unnatural scents for essential oils and homemade potpourri instead.
Need more inspiration? Here are some links for further reading:
Climate Change: How to be more eco-friendly in everyday life
100+ Simple Tips To Live a More Sustainable Lifestyle
40 Ways to Go Greener at Home (Besides Just Recycling)
14 Holiday Diffuser Recipes To Make The Season A Little Brighter
]]>Nothing is worse than mismatched cutlery! Use your cutlery rolls to keep individually wrapped sets safe and make them easily accessible in a handy caddy for whenever they're needed.
3 Heritage Day Salad Dressing Ideas
Reposted from a South African Heritage Day blog in 2015! A lot has changed but I am still making these dressings.
Good of you to volunteer to make the salad for this week’s Heritage Day Braai! With so many great mixed leaf salad options available, one could simply make the salad dressing the hero. Here is a bit of inspiration.
Feta Herb Salad Sauce
Throw everything in a glass jar with an opening big enough for a stick blender. Blend and seal. Keep in the fridge for up to a week.
1 ½ rounds herb feta cheese
¾ cup cream
4 tbsp apple cider vinegar
2 tbsp olive oil
ground salt and black pepper
Add a tad of milk or water to get the consistency you like. Mine is always more of a sauce then a dressing.
Roast Garlic
Roast 3 big cloves of garlic with skin on in the oven – this can be done anytime you have the oven on and kept in a sealed glass jar in the fridge for a day or two.
Squeeze garlic out of its skin and bash up in a pestle and mortar with Dijon mustard, and course salt and dried mixed herbs. Wisk in 6 Tbsp olive oil and 3 Tbsp red wine vinegar.
This dressing will get better with time so take a slow drive to your braai.
Poppy and Lime
I know- a lot of ingredients. If you don't have it all, improvise or leave it out. The main theme here is fresh lime - not always so easy to find, but they are available now and delicious with simple greens and finely chopped cabbage.
1/2 cup coconut milk
2 Tbsp olive oil
3 Tbsp white wine vinegar
2 small cloves or 1 big clove crushed garlic
1 Tbsp fresh grated ginger
1 Tbsp poppy seeds
1 Tbsp toasted sesame seeds
1 tsp Dijon mustard
Juice of 1 lime and zest of 1 lime
Salt and pepper
]]>
This blog post was originally featured on our South African website for South Africa's Heritage Day in 2019. Our community has grown!
Feature veggies on the fire this heritage day with this simple homemade vegetable seasoning. Your vegetarian and vegan friends will be thrilled that someone has finally made a veggie effort at what is typically a very meaty affair. The aim here is to not spend all day in the kitchen so it's easy and versatile veg sprinkles at the ready!
Mix in a shaker if you have one - if not, a small bowl will do.
Ingredients
1 tsp paprika
1 tbs garlic salt or garlic powder and salt
1 tsp ground cumin
1/2 tsp ground cinnamon
Brush vegetables lightly with cooking quality olive oil and sprinkle both sides.
Serving Suggestion
Cut butternut squash, sweet potatoes and beetroot into disks, peppers, corn on the cob, and mushrooms are also great.
We would love to hear your suggestions for veggies on the braai>
]]>The front door represents our connection to the world. it connects our inner world to the outer world. The front door is considered the mouth of universal energy. It is through the front door that you home receives it’s nourishment of energy. The quality of this energy determines the quality of energy in your home. Keep the front door area clean and clutter-free so that the positive energy coming into your life is not being compromised and your full potential is available to you..
2. Check your Commanding Position
This is the spot in a room furthest from the door and not in direct line with it. It puts you diagonally to the door. Ideally, you should have a clear line of sight to the door and never have you back facing it. The three major elements of the home that need to be in commanding positions are the bed (representing us); the desk (representing our career or purpose); and the stove (representing our wealth). Place these items in the commanding position. The essence of this position is about being the commander of your own energy so that you do your best in any situation. It also helps you to feel relaxed and secure in your space.
3. Keep Your House Clean and Clear of Clutter
Energy needs to flow freely, and clutter disrupts the flow creating negative energy. It can drain you of energy, keep you stuck in the past, and make you feel uncomfortable. Remove clutter and let clean air and light fill your home. Walk through your home and remove anything that could stop the flow of energy. Windows should be kept clean to let in the light. Make a habit of cleaning up your space each day and keep your home well ventilated to ensure positive energy and good luck.
4. Keep What You Love, Clear the Rest
In Feng Shui, every object in your home is a vessel of energy - both positive and negative. Every item in your home should either be useful or loved. Unwanted or unloved possessions hold low vibrational energy and negatively influence your life, representing the past. Remove these items to bring clarity and positivity in your life. Keep your home interior simple and understated, and surround yourself only with things that make you happy.
5. Remove or Fix Broken Items
Broken things symbolise being broke and having diminished financial energy. They also contribute negative energy or block positive energy. When you ignore things that are broken, you set an intention of neglect. However, when you fix broken things, you set an intention to attract abundance. If you are not able to repair broken items, remove them from your space.
Find Deirdre on Instagram @deirdrerenniers
]]>Daily bread is daily for a good reason. Freshly baked bread isn't going to stay fresh without preservatives to prolong shelf life. Home-baked and artisanal breads are at their best for only a day or two, the way it was before sliced bread was the best thing!
Whether you are enjoying making your own bread at home, or picking up a freshly baked baguette from the neighbourhood baker for the evening meal, the basics are the same.
Bread should always be stored at room temperature, covered by something that will allow a little air to circulate so it doesn't grow mould, or become hard and chewy. At the same time your bread needs to be protected enough to retain some hydration to not dry out prematurely.
If on the third day you have a beautiful, crispy, dry chunk of bread, perfect to be put in the blender for breadcrumbs, then you have bought well (without preservatives) and stored perfectly.
Here are some storage solutions to consider:
The Bread Box - Remember those? They were originally designed to store freshly baked bread without any covering, not today’s collection of mouldy heels in plastic bags! A bread box allows for the flow of air around the bread and retains some humidity in the closed area of the box.
Paper bag (not breathable) - If left open or loosely closed air can get in. Add to that, they are likely to tear; this is a good short-term option for getting a warm fresh loaf from the bakery to home.
Naked - How they are stored at the bakery. Bread that is still warm from the oven should be left uncovered for about 4 hours. Depending on the humidity of your environment and the self-discipline of your housemates, a fresh uncut loaf can remain standing on the counter all day. If keeping it out of sight is necessary, try a cupboard or a drawer that remains at room temperature. Not on top of the refrigerator or beside the stove.
Fabric bags - A great alternative if you don't have space for a bread box, and perfect for shopping at the bakery. Fabric is breathable, allowing a little air circulation but still covers enough to retain some moisture in the post baked dough.
Freezing - This is a great way to enjoy freshly baked bread later. Freeze immediately after it has cooled. Depending on the type of bread, slicing it and sealing it in a store-bought sliced sandwich loaf bag can be convenient.
Tip - I froze a fresh baked baguette, in a paper bag, inside our baguette bag. Several weeks later I removed the baguette bag and paper bag and left it on the counter for an hour to defrost. It was perfect!
See our selection of bread bags> United States United Kingdom South Africa
]]>
One of the much-anticipated Easter traditions is The Great Easter Egg Hunt. The pressure mounts as grocery stores display stacks of individually wrapped and foiled Easter treats, packed in brightly printed boxes that are also covered in plastic. It's very tempting. That makes the Easter Bunny's job super easy. Tear it open, throw them around the backyard and hop on to the next task on the list.
How can we do this with as much excitement and a lot less plastic and foil? Will the kids think something is amiss with the Easter Bunny this year? On a practical note, one of the conveniences of plastic packaged Easter treats is that they are protected from the damp and dirt in all of the best outdoor hiding places. (not to mention pets) The Easter Bunny may need to add creativity to its list of magical talents, but it can be done. Here are some suggestions.
Overcoming the challenge of the weather and dirt.
A good place to start is your grocery store’s offering of refill or bulk shopping.
Use containers that are functional all year around.
For those who like to bake.
Whether you are a zero waste-er or just wanting to reduce single use plastic this Easter, the important message is- better is best. Enjoy the family time and the games that Easter inspires. Hey kids, the Easter Bunny has gone green! Happy Easter.
]]>59
Are you retired?
No. I am a housewife who loves to knit & crochet.
Have you had other occupations?
I was a telephonist and receptionist.
What would you be doing, if not producing SPAZA products?
I would be knitting for myself or charity.
What’s the best part of making SPAZA products.
I get to do something I enjoy.
…and the worst?
I enjoy it so much that I do not get to knit for myself.
How does this work benefit you?
I have been able to regain my confidence and independence.
What benefit could this work have for others and the community?
It could help people to feel useful in the community while earning.
What’s your most memorable experience in making SPAZA products?
Meeting the team that make SPAZA successful and knowing that people like to buy the products that I have made.
Colleen's cloth is only available in South Africa.
]]>A recent article from online magazine TheKitchn.com recommends that you replace your synthetic sponge every week to avoid spreading harmful bacteria growing in the damp pores of the sponge all over your kitchen. Not all of us are so diligent, but for those who are, that is 48 disposable plastic sponges taking roughly 58 years each to decompose in landfill sites.
The over-arching problem with disposable products made from oil-based materials like plastic and polyfoam is that we don't use them long enough to warrant the resources used, environmental damage caused and the time it takes to decompose. How long should you use something made from non-renewable resources like petroleum, that is not recyclable and takes 58 years to decompose?
Synthetic sponge manufactures have tried to increase consumer confidence by making 'anti-bacterial' sponges. To do this toxic anti-fungal, anti-bacterial agents like triclosan are added. Triclosan does not biodegrade in our water systems and is known to be harmful to aquatic life. Studies are incomplete on the effects of triclosan on dish pan hands.
The Spaza Tawashi doesn't look like a sponge but it works exactly the same. The name tawashi comes from a Japanese style scrubbing brush. Originally hemp fibre, the term is used widely for brushes and scrubs of different materials. Our tawashi is made from the plant fibre; jute which is perfectly and naturally anti-bacterial, biodegradable, long lasting and slightly absorbant so it makes those satisfying soapy suds.
Jute is a plant that is widely grown in parts of South Asia where it enjoys a dry and humid climate. Cultivation of jute requires no pesticides, is good for soil health, non toxic when burnt, produces strong poles used for building or firewood in communities where it is grown. The farming and processing of jute creates small industries and employment in rural areas.
We have been making our Tawashi and using them in our kitchen for three years now. On the 15th of December 2020 we started a longevity test, posted on social media. At the time of writing this blog, 31st of January 2021, the tawashi under inspection is still going strong. With every member of the family mostly locked down at home for every meal and snack of the day - it is getting a lot of use!
Being naturally anti-bacterial, the tawashi refreshes fully in a shallow bath of kettle water, and vinegar or a run through the dishwasher every couple of days. We have treated it to a sprinkle of oxygen bleach with no harm done. The only real enemy of the tawashi is a sharp kitchen knife in the dishwasher.
Our Tawashi is hand-crocheted by women working from homes in and around Cape Town, South Africa. Many of our producers are caregivers to children or elderly and benefit from the self-sufficiency home-based income can provide.
There has been a lot written about disposable synthetic sponges and their eco-friendly alternatives lately. See the links below for further reading.
The Dirty Dozen: Triclosan- David Suzuki Foundation
The difference between cellulose and those other kitchen sponges-Treehugger
21 Little Ways to Have a Cleaner Kitchen-The Kitchn.com
Sponges Things to Avoid-The Kitchn
Nature.com; micobiome analysis and confocal microscopy of used kitchen sponges
]]>
As easy as opening a bag of chips, was the brief. Readily available from your zero waste grocer and using simple ingredients, here are 3 snack inspirations to enjoy with a bit of cheer this festive season.
Soya Roasted Sunflower Seeds
You only need sunflower seeds and soya sauce but you can add cayenne pepper for a spicy version or mix a tad of honey with the soya sauce for a sweet and salt flavour.
Layer the bottom of a heavy base skillet of non-stick frying pan with raw unsalted sunflower seeds. Roast slowly, moving them so they roast both sides and don't burn. (5 minutes)
One the sunflower seeds have started to colour stir in a bit of soya sauce and keep mixing while the sauce evaporates. (super quick!)
Let cool slightly and serve.
Covid Safety Tip: Serve in many tiny bowls and providing colour coded teaspoons so everyone can spoon a helping into their hand.
Honey Roasted Almonds
Preheat oven 350°F / 180°C
Warm one big table spoon of honey and mix in a small teaspoon of olive oil.
Layer almonds on a baking sheet. Two handfuls, 1 1/2 cups or so.
Drizzle honey oil mixture on the almonds, mixing to coat and spread out again. Sprinkle with sea salt.
Roast for 15 minutes and serve.
Cleaning Tip: Pour kettle-hot water over the tray to remove excess honey to make cleaning up easier.
Oven Potato Wedges (best potato chip substitute)
Preheat oven 350°F / 180°C
Half the potatoes lengthwise and then in thirds. Toss in olive oil, salt and rosemary on a baking tray. Stand each chip up on its skin. Roast for 35 minutes. Serve!
These can be pre-cooked in the oven for 20 minutes and fired up again closer to drinks time.
]]>'I have never been a fan of plastic wrap, so I would cover all our dishes with tea towels while entertaining or preparing a meal for my family.’
The problem arose when I needed to bring a salad or dessert to someone else’s house, or if I wanted to keep a dish refrigerated. I experimented with some tying and wrapping techniques that proved to be very bulky and fussy. What I really wanted was something light and breathable that would stretch around the sizes and shapes of my dishes. A lightbulb went on and I started making dish covers.
When I could no longer keep up with demand, I started looking for women who could sew in their homes. Having employed mothers and wives in manufacturing facilities in the past, I saw that these often-troubled communities needed to have the guardianship of women. The women provided stability to the family and are the eyes and ears of neighbourhoods. I worked towards an arrangement where women had the flexibility to be home when children returned from school and could still earn their own money. We provide the materials and equipment and have a weekly drop and collect system that has resulted in the upliftment of many women’s lives and hopefully brought some hope to families and their neighbourhoods.
To facilitate our work-from-home mission I started printing the dish covers with stamps that I carved by hand. Today our dish covers are screen printed due to the increase in volume, with the original designs still being hand-carved stamps.
We have limited power over the single-use plastics found in mainstream grocery stores - but we have complete power over what we use in our homes. Spaza dish covers are plastic-free making them a breathable cover for food. Being breathable, dish covers eliminate condensation and through the process of evaporation, allows your food to cool quickly in the refrigerator. I am often asked, ‘does it keep the food fresh?’ and I am reluctant to burst the bubble created by advertising stating ‘plastic locks in freshness.’ Luckily for the planet – freshness is related to the time since the carrot has been pulled from the earth. Plastic can seal in moisture, and even create moisture through condensation but it can’t do much about time.
Spaza dish covers are available individually or as a set of 4 sizes for everyday storing and serving. Small is ideal for single servings, leftovers or condiments. The medium size suits a pasta bowl serving or a small salad. Our large size fits most table salad bowls while the extra-large is ideal for entertaining and will go over odd-shaped casseroles and servers. There is also a handy set of mini sizes for storing bits and bobs in the fridge.
]]>Spaza products are made by women in various communities around Cape Town. Producers, from Mitchells Plain, discuss working from a successful home-based business.
]]>
The question that I get most about our dish covers is, do they keep your food fresh like plastic?
As mother nature would have it, fresh is related to time. The theory that plastic can 'lock-in freshness' was discovered around an advertising agency's boardroom table and not in a science lab.
]]>The question that I get most about our dish covers is, do they keep your food fresh like plastic?
As mother nature would have it, fresh is related to time. The theory that plastic can 'lock-in freshness' was discovered around an advertising agency's boardroom table and not in a science lab.
Let's take a carrot for instance. The carrot is fresh when it is pulled from the earth. From that moment on, it becomes less fresh.
A breathable cover, such as a Spaza Dish Cover is advantageous because it allows for evaporation and evaporation aids in cooling.
You may have a vague memory of this from a science test moons ago. The process of evaporation requires heat energy and the heat energy is lifted away by the molecules as they change from liquid to vapour resulting in the cooling of the surface. This is also how our bodies work to cool us down when we are hot.
Wrapping food in plastic will keep it moist and even add moisture due to condensation. The opposite of evaporation, condensation makes liquid droplets out of vapour- vapour from plastic in this case. Those droplets can carry toxins from the plastic to your food.
Imagine you have prepared a salad and the temperature of the fresh produce has risen to room temperature. If you seal your salad with plastic, you are locking in the room temperature. Once in the refrigerator, your salad sits and waits for the bowl it's in to get cold enough to start cooling down its leaves. In the meantime, the salad tries to cool itself down by sweating and the vapours turn to droplets.
A refrigerator is a very wet environment so your food won't dry out instantly. Depending on what it is, it may dry out after a few days, in which case it is not fresh anyway. We did a test with penne noodles and olive oil under a dish cover in the fridge. It was good for 3 days and after 6 days it was dried out but the dog loved it.
The efficient cooling of your food with a breathable dish cover and produce bought often and from as close to the source as possible should result in good quality, fresh-er food.
]]>In the end, we chose Mokgadi Masipa's very clean and contemporary design. We felt Mokgadi's concept was universal and it made us smile. Add to that, Mokgadi has worked very hard on developing a very creative Instagram account which we thought deserved some exposure. Check it out here> @mokgadimasipa_
Mokgadi grew up in Soweto, Meadowlands in Gauteng with her three siblings, mom and dad. After completing her matric, she decided to go on to art school to study multimedia design and production.
We asked Mokgadi a few questions about her craft, her life and to conceptualize an app to fix the problems in South Africa.
Why did you become a designer?
My answer may be a bit cliché but design chose me. I went to upgrade my marks after matric because I didn’t know what I wanted to study going into tertiary. When registrations opened for the following year, I just collected all the pamphlets I could get, laid them on the table and an art school stood out for me.
Where I went to school, a career in the media/art industry was never an option. So, when I saw that art school, it was like my eyes have been closed and I just opened them in that moment. I did some research then, that’s when I decided to study Multimedia design and production.
You say you take 20 taxis getting to work in a week……what do you like to do while you are travelling?
I always try to find a seat by the window because I’m a bit claustrophobic and I like just looking outside as the taxi passes by. I sometimes listen to music if the taxi is quiet.
I love the way you use the written word with your surface pattern designs on your Instagram feed. What impact would you like to have with this art?
For me, art has always made me smile, be sad and think. I just want my art to evoke emotion from people hopefully, positive emotions. I hope they will fall in love with my art and appreciate it as much as I do.
So we need to fix the problems in South Africa, and someone says, ‘there is an app for that’. What would the app do?
One of the main problems is unemployment and that’s what I would like the app to address. I think the app should provide a list of in-demand skills for at least the next 5 years so that pupils going into tertiary can study courses that will give them a better chance of employment after graduation.
How did you come up with the festive design for Spaza Dish Covers?
A lot of brainstorming was done, and I didn’t want it to be predictable but still make it feel like Christmas. My style in terms of design is simple, modern and linework/geometric shape.
So, the main idea was to feature the Christmas icons but in a design style, I know. I only wanted to use circles and semicircles to highlight my concept which was: “We never want the festive season to end and we wait the whole year for it to come back around. A play on words.”
What is your next life goal?
My next life goal is becoming a brand in the design space and seeing my patterns used on multiple materials/platforms like fashion, textiles and interiors. And maybe opening a fashion line.
What is your best home or beauty eco-friendly swap?
We always try to buy refills of products and keep the original packaging. When we go grocery shopping, we use bags, we don’t use plastics. We have solar lights that we use when we experience load shedding, no candles.
Our festive-themed dish covers will be available online and from our store in The Watershed, V&A Waterfront from the 8th of November.
]]>My grandmother knit a prototype that I brought back to South Africa and gave to a fantastic group of knitters living in Manenberg, on the outskirts of Cape Town. Working from home, they are able to generate an income and still be available for their families and communities.
.
The Posh South African Kitchen Lappie is made from super-absorbent South African grown and processed cotton yarn. Not only does this support its tiny carbon toe print, but also makes them gracefully biodegradable. Wash your Lappie on the top shelf of your dishwasher with your dishes eliminating the need for bleach, which is a nasty pollutant and will shorten the life span of your cloth and be sure to keep away from knives. Cared for properly, your lappie will last for
When I first started making the cloths, I thought the best way to introduce the idea was to sell them at markets. So there I stood with a trestle table full of what must have looked like knitted squares. A curious passerby stopped and after I had presented my well-rehearsed sales pitch, she looked at my table of cloths and said, "Oh so it's just a posh lappie."
Lappie is a South African word for anything that you would wipe with. It comes from the Dutch word lapje meaning a small cloth or rag.
Then along came The Scrub, hand-knit from the natural fibre sisal. One can see sisal growing wild in South Africa, brought here from Mexico long ago. It is naturally tough and makes a good rope. The scrub also washes nicely in the dishwasher and lasts a long time - but not too long - like a plastic kitchen scourer which never fully breaks down. The Scrub is a perfect kitchen tool when you need a little abrasion without scratching.
]]>It was the simple satisfaction of harvesting a hot aromatic cup of tea from my garden that inspired this blog post. I was reading up on how and why we use tea cozies and discovered all these hot infusions that I had not considered. Thyme, basil, and I had forgotten about drinking lavender tea. Now, I'm the hunter-gatherer with the red teapot!
Mint
Lavender
Lemon Verbena
Basil
I don't have fennel growing but it makes a great after-dinner brew and is easy to grow here. You can also make fantastic combinations so have a look for some recipes according to the herbs you have growing.
These infusions are also great once they have cooled down, add ice and lemon for refreshing summer drinks. Ah - and no packaging!
]]>